There’s something about giving or receiving a homemade gift that makes the moment much more special. Last Christmas, my fiancé Todd and I decided to start a new tradition of making at least one homemade Christmas gift for each other and exchanging them on Christmas Eve. It soon became a favorite tradition of ours and one we wish to continue on for many years.
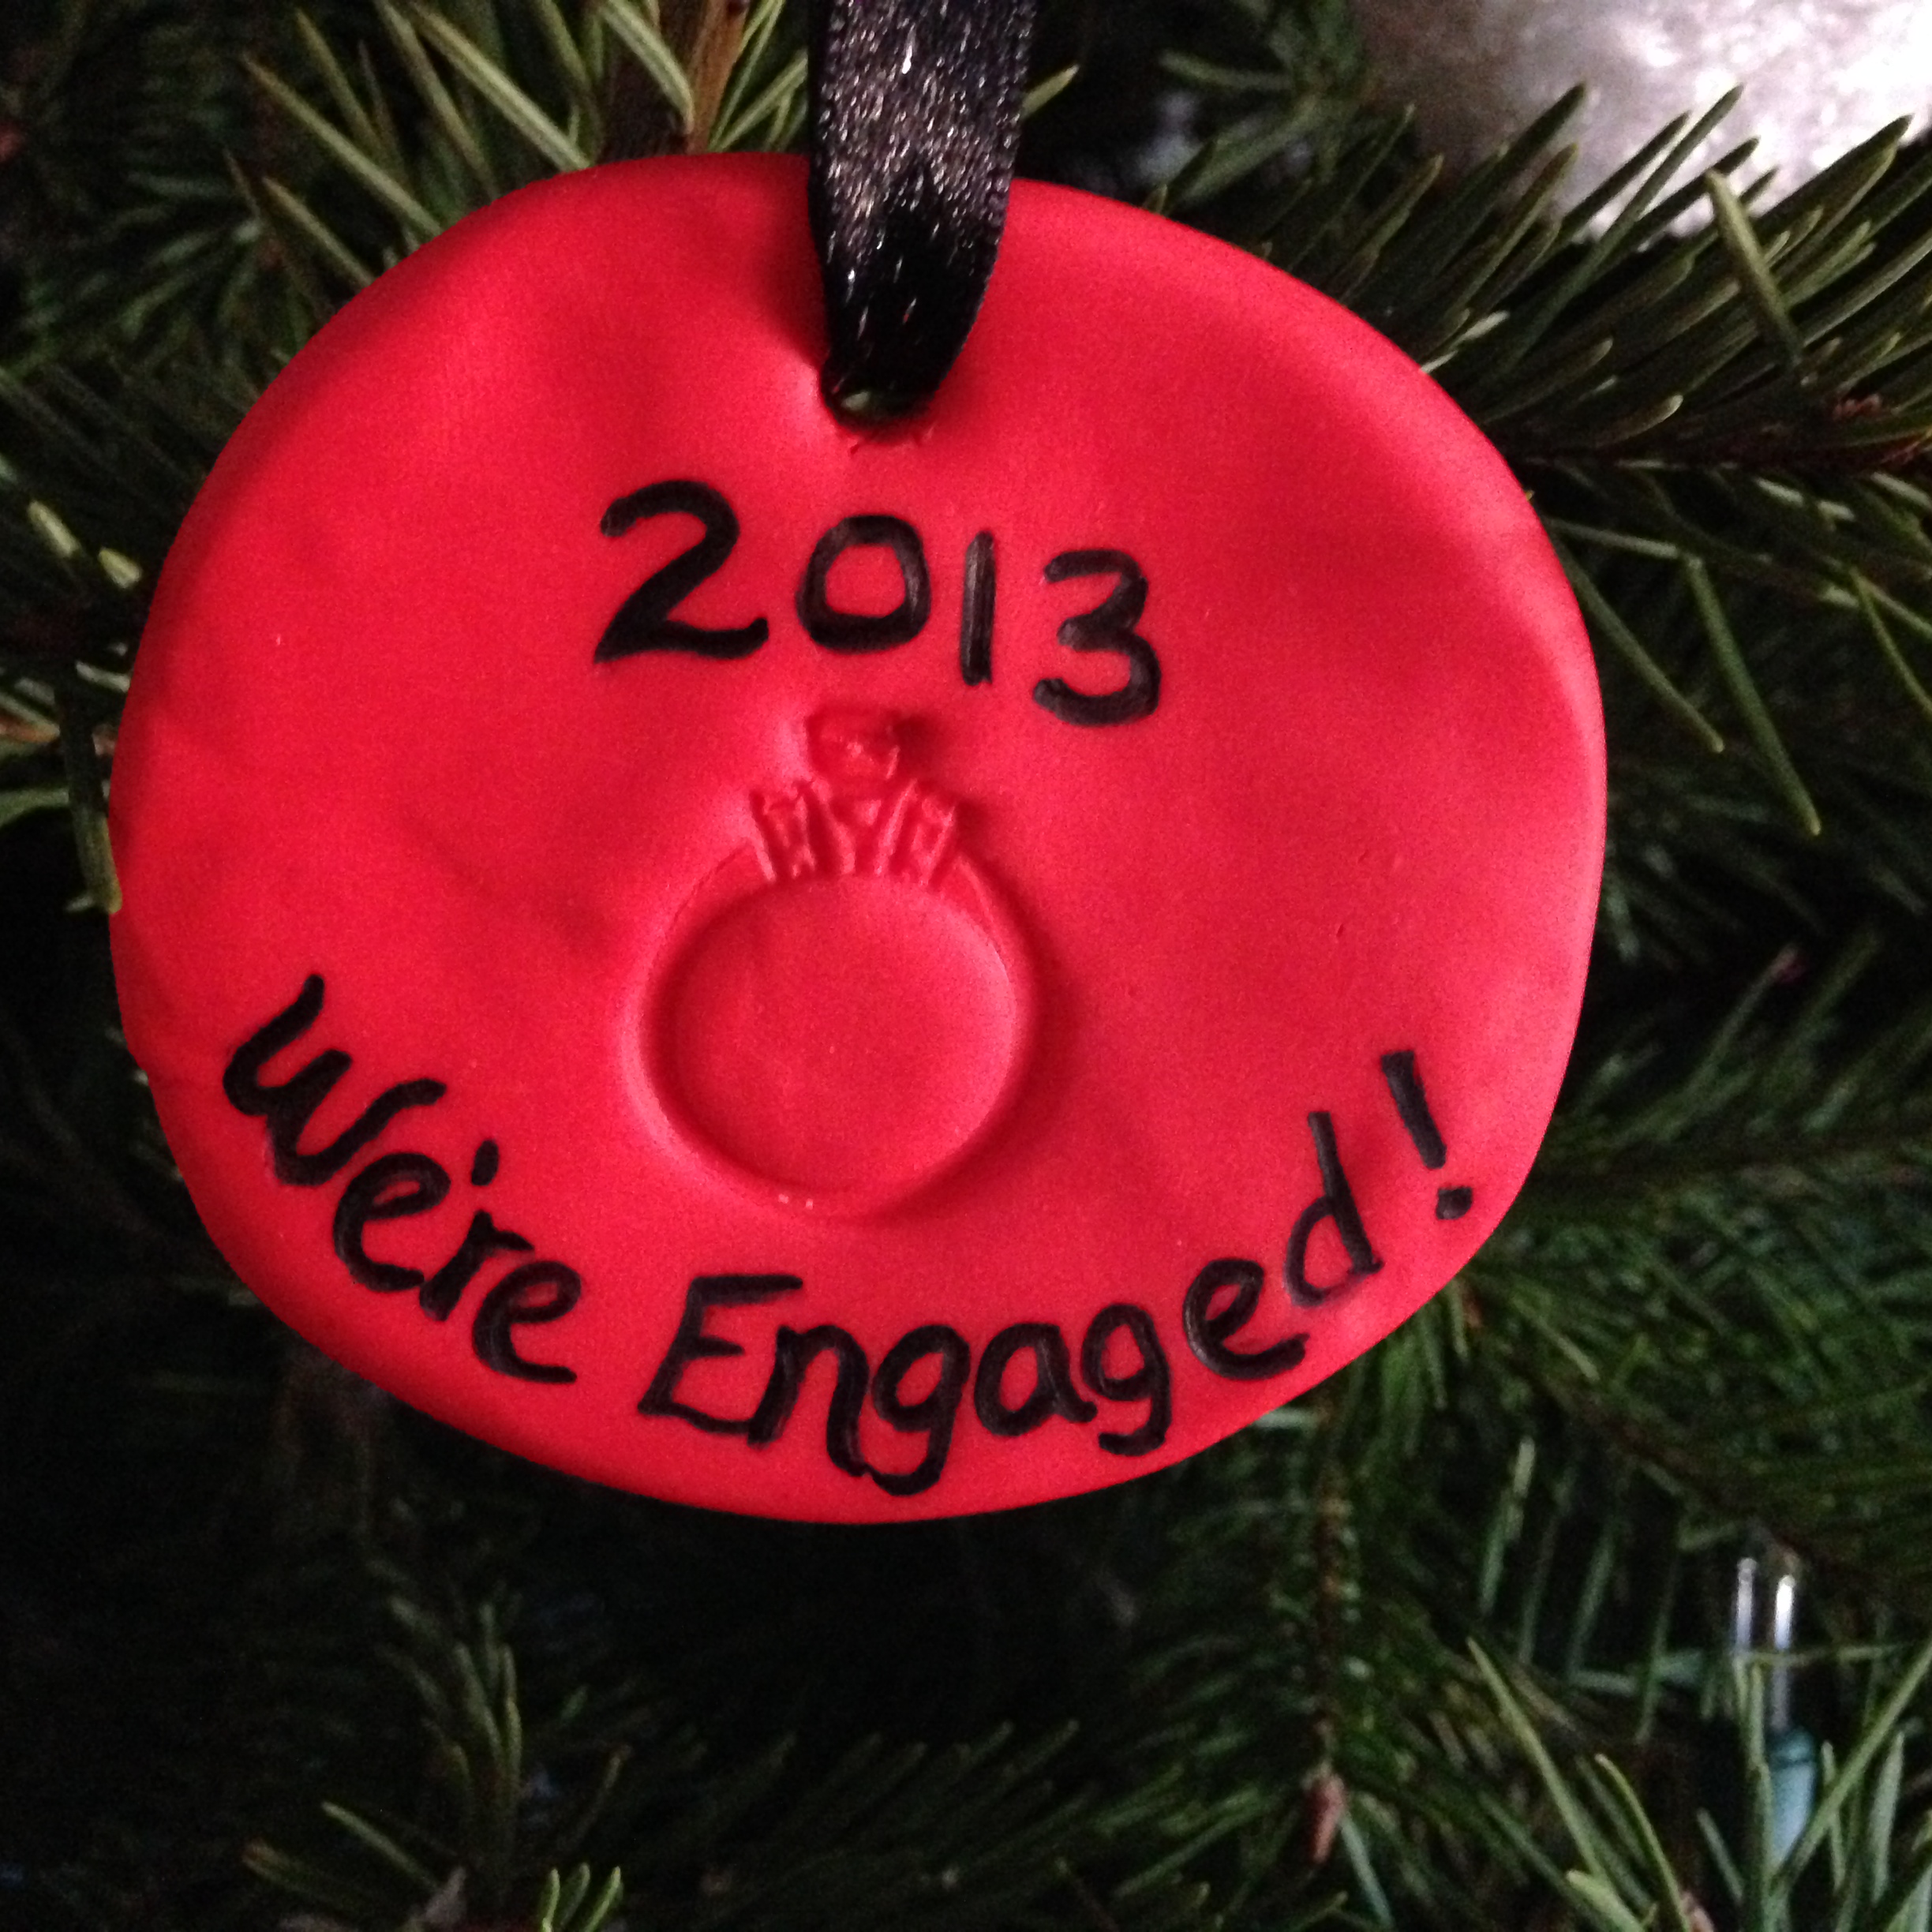
My inspiration came from a popular pin I had seen on Pinterest using an impression of a key as an ornament to celebrate a new home together. (Click here to see original pin.) Last year, Todd’s gift to me was based on us recently moving in together, therefore I decided that I did not want to copy his same concept.
Being that we got engaged this year, I decided I wanted to somehow incorporate our engagement into his gift. I decided to modify that Pinterest post by using my engagement ring to make an impression, rather than a key. Todd loved it and it’s one of our new favorite ornaments! :)
Materials:
- Engagement ring
- Modeling clay (about 1 oz) – I used Fimo Modeling Clay 2oz Block-8020-24 Indian Red. Although any oven baked modeling clay should work.
- Sharpie
- Toothpick
- Ribbon/string
Steps:
1. Take about 1 oz (half the block) of modeling clay and roll it around in your hands to soften it up.
2. Once soft, roll the clay into a ball and begin to flatten in between your hands until it is circular shaped. Smooth with fingers to avoid cracks and lines in the clay.
3. Take your ring and press it into the clay hard enough so that it leaves an impression, but not too hard that it goes through the clay or is too difficult to remove without breaking the clay. I placed mine about halfway in.
4. Use a toothpick to create a hole for the string so you can hang your ornament when finished.
5. Bake the ornament for 30 minutes at 250°F (Baking times may vary depending on what type of clay you are using. Follow the instructions provided on the clay package.)
6. Let the ornament cool after baking and then use the sharpie to write your message. (Note – I wrote on the ornament before baking, although it came out ok, I think my handwriting might have been a lot better if I had waiting until the ornament was solid to write. I had to touch it up once I finished.)
7. Tie string or ribbon in a bow and you’re all done!
*The link above is an amazon affiliate link. All profits go toward the support of my blog. :)