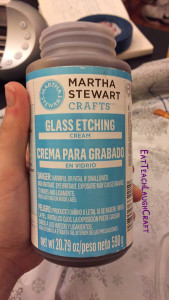
Ok, so full disclosure… I bought some etching cream to etch some glass way back in December but I’ve been too nervous to try it until now. I’m not exactly sure what was holding me back.. I think I thought I was somehow going to mess it up in some way. But I got over my fear, cracked open the bottle, and etched away.. and I’m SO glad I did! It was WAY easier than I thought. I’m now addicted. :)
Materials Needed:
 Etching cream: I used Martha Stewart’s Etching Cream, but you can also use Armour Etch, EtchAll or Silhouette America Etching Cream. The reviews are all pretty much the same for the different creams. Some people love certain brands and some people hate certain brands. Therefore, I bought the one that was on sale at the time and would give me the best value for my money.
- Glass container of preference: vase, mason jar, champagne flute, wine glass, etc. (I recommend starting off with something with a flatter surface. The more curved the surface, the easier it is for the cream to leak through the stencil.) Check out stores like the Dollar Tree or Amazing Savings for decent quality glasses at a low price.
- Stencil of choice: I create my own stencils with my Silhouette Portrait and some contact paper or non-permanent vinyl. However, you can use painters tape as a stencil to make line patterns on glass, use a store bought stencil, or create your own using another method of your choice.
- Paint brush: to apply the etching cream
- Rubber gloves: to protect your hands from etching cream when applying and washing off
Steps:
To begin, make sure you have an open area to work. I use a coffee table in our spare office and put a tarp down to protect against any damage.
 Make sure you wash your glass before etching it as you need a clean surface to work with. Soap and water works well, although some people recommend using rubbing alcohol as well.
Apply your stencil to the desired area. Because I use contact paper for my stencil, it sticks right to the glass.
***(ONLY APPLIES IF YOU DO NOT USE AN ADHESIVE STENCIL) If you are using a different type of stencil other than some type of adhesive, make sure you tape the sides with painters tape to adhere the stencil to the glass. Before applying the etching cream, apply a very light coat of mod podge to the glass to seal the stencil in place to ensure no leaks.
After your stencil is on your glass, rub your finger over the edges to release any air bubbles that may be present. It’s important that all edges of the stencil are secured to the glass or else the etching cream may leak under the stencil.
Put on your gloves to protect your fingers just in case any of the etching cream drips.. You don’t want to etch your hands! :)
 Apply a generous amount of etching cream to the exposed glass. You want a thick layer, about 1/4 of an inch dispersed evenly.
Now the hard part.. wait 10-15 minutes! I’m super impatient when I craft and always want to skip the waiting. Hence why all my paintings have the “distressed” look because I can’t wait for the first layer of paint to dry before applying the second coat! It’s a sickness.. but you REALLY have to wait the full 10 minutes, at least, for this project in order to create a successful etching.
Once the time is up, rinse the glass under the sink and remove all of the excess cream. Make sure you wear your gloves for this part because you will need to rub the glass to get all of the extra cream off.
Once it’s done, I like to run it through the dishwasher just because I have a fear that the etching cream, even though removed, will somehow harm me! Etching with a cream makes the glass dishwasher safe! So yes, it’s safe to do it.
Once washed, it’s yours to enjoy or give as a gift! Let me know how it goes when you give it a try :)


